Sometimes, all you need to do with your car to give it a fresh new look is simply applying a fresh layer of the best tail light tint. The actual effect a new layer of tint can give to your car might be more significant than you think. As long as you keep it legal, that is (we will get into that in a moment). While there are various ways to refresh the light tint, in the following guide I will address the most practical ones – sprays and films.
Before you opt for a tinting method that suits you, we should talk about all the aspects of tinting the taillight, and if you are feeling extra creative – the headlights as well. Now, let’s dig in and see how you can make your car look slick and fresh again.
What Is Tail Light Tinting?
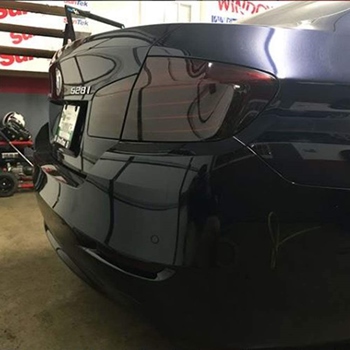 As the name suggests, tail light tinging is the process of putting a new coat of tint over your tail lights. But, the reasons to do so vary from driver to driver. A new coat of ting can give your car a fresh new look, but it can also deliver a new protection layer to the lights.
On the road, you’d be amazed by how many times a light breaks thanks to pebbles flying around. A new coat of tail light tint will prevent a lot of those situations by putting a protective layer over the old one. There are many ways to apply the tint, with sprays and films being the most popular, and above all – most DIY-friendly.
There are virtually no downsides to getting your lights some new tint. That is, there are no downsides if you don’t overdo it. Applying a layer that is too thick can impair the efficiency of the light, thus defeating the purpose of light in the first place.
Who Is Tail Light Tint For?
Well, to be completely fair – most drivers that opt for a fresh new coat of tail light tint are the same people who are into cars for more than just a means of transportation. Tail light tinting isn’t an essential part of the car, not by a long shot, but some people find it crucial from the point of aesthetics. The protective layer is just a plus in this case.
Applying a new layer of tail light tint is also for people who want to give their vehicle a low-cost visual upgrade. This is a great entry-point for car styling, and the DIY aspect only helps the cause. So, if you are new to car detailing and styling, tail light tint is a good point to begin that journey.
Tail Light Tint Types
As I mentioned above, tail light tints come with different application methods, but the two that stand out are:
- Tail light tint sprays
- Tail light tint films
These main two methods are easy to do, and even a beginner can get into the whole process quickly. Although both methods have distinguishable differences, the end result is almost the same. So, what gives?
1. Tail Light Tint Sprays
Spraying is arguably the most efficient and beginner-friendly way to apply a coat of tail light tint. The DIY aspect comes down to how often you used a spray product. I guess you could say that applying spray tail light tint is similar to spray painting.
The reason why gave praise to people with experience in spraying is simple – spraying makes a lot of mess if not done properly. The actual action of using the spray can is the shortest step of the process. Preparation is key. So, if you opt for the spraying method, don’t forget about prep time.
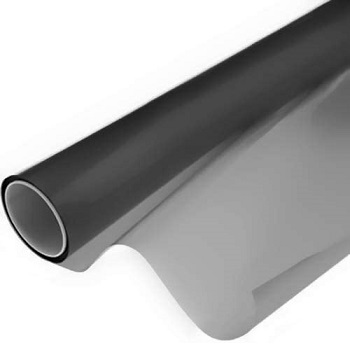
2. Tail Light Tint Films
The tint films are somewhat harder to apply, but you get to practice without leaving a mess behind. The main step in applying the tail light tint films is – measuring and cutting. Also, experience with a heat gun is a bonus.
One more thing to keep in mind – applying film tint onto your tail lights lasts longer than spraying it. So, make sure to account for the time to cut, apply, fix, and detail. Though I promise you that it gets easier every time.
Best Tail Light Tints Comparison Chart
| PRODUCT | DETAILS | ||
|---|---|---|---|
 | VViViD Air-Tint Matte Black Headlight/Tail Light Window Tint |
| View On Amazon |
 | VViViD Air-Tint Dark Black Headlight/Tail Light Window Tint |
| View On Amazon |
 | Yellow Lens Spray Paint for Car Headlights, Tail Lights |
| View On Amazon |
 | Dupli-Color ECWRC8157 Custom Wrap Lens Tint Smoke |
| View On Amazon |
 | Rust-Oleum Automotive 253256 10-Ounce Lens Tint Spray |
| View On Amazon |
 | Luxe LightWrap Mid Smoke Universal Headlight Tail Light Tint Kit |
| View On Amazon |
Best Tail Light Tint Sprays and Films – Reviews
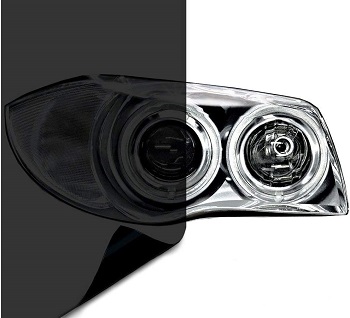
1. VViViD Air-Tint Matte Black Headlight/Tail Light Window Tint
The VViViD was in the game of light tinting for a long time. Now, this particular matte black set is versatile and easy to use. The manufacturer also offers four different sizes in case you want to tint more than just your tail lights or you own a bigger vehicle.
This film is super-easy to apply, and it is great to work with against irregular surfaces. On top of that, the tail light tint film has a self-healing layer, making it last longer. Lastly, the film is suitable for coating headlights as well, as long as you keep it within legal limits.
Pros
- Self-healing technology mends smaller bumps and scratches
- This particular film can be applied on headlights as well
- The manufacturer offers four different film sizes for all sorts of purposes
Cons
- The film’s matte black finish might dim the headlights to a degree, so make sure you go easy at first
2. VViViD Air-Tint Dark Black Headlight/Tail Light Window Tint
For a sportier look, going all dark black can be a real gamechanger. This set from VViViD offers you the chance to coat both headlights and tail lights with a dark tint. As you might already know, these tint films are quite sturdy, and best of all – they come in all sizes. So, if you are into big cars, you are covered.
The vinyl used to produce these films come with a safe adhesive to help you apply the layers. Additionally, the tint does not dim the headlights that much, in case you never tried dark tints on your headlights before.
Pros
- The installation is super-easy and the film is easy to cut and shape
- A whole range of sizes to choose from
- The headlight tint won’t dim the headlights too much
Cons
- Careful once you remove the protective layer – the film is extra sticky
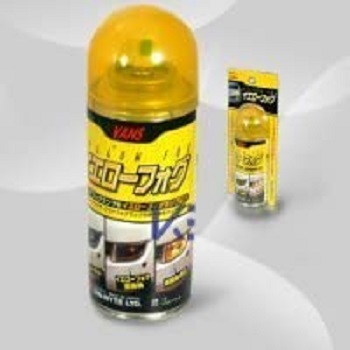
3. Yellow Lens Spray Paint for Car Headlights, Tail Lights
One of the best ways to refresh your tail lights once they turn colorless is to use a can of this spray. While it is not a spray color that darkens the tail lights, it does offer a new-car look, focusing on the bright yellow color.
This Japanese brand of tail light tint spray can also be used with fog lights, as well as bumper lights. While the yellow is brighter than the average tail light tint, this particular spray will work on darker shades, like amber and honey.
Pros
- A versatile tail light tint spray that also covers bumper lights and fog lights
- The yellow can go over darker shades like amber, as long as you apply the spray properly
Cons
- The color is a bit harder to take off if you make a mistake. Standard paint removers should do the trick
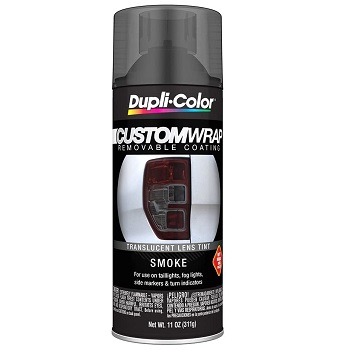
4. Dupli-Color ECWRC8157 Custom Wrap Lens Tint Smoke
Not being restrained by color is great. This Dupli-Color comes in all sorts of colors, both from the value and surface point of view. You get to choose from a spectrum of colors, yes, but also from the spectrum from matte to gloss finish.
One of the best things with this particular tail light tint spray is that you can apply it on all sorts of materials, like metals, chrome, plastic, and aluminum. And, if you happen to make a mistake, the EZ Peel formula allows you to peel off the layer once it’s dry and try again.
Pros
- A whole variety of colors to pick from, not only yellow and black
- The spray can be applied on all sorts of surfaces, metallic and plastic
- The EZ Peel allows you to peel off the layer of tint if you make a mistake
Cons
- Some brighter unconventional colors can look a little off if not applied properly
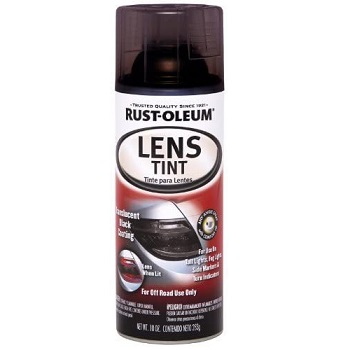
5. Rust-Oleum Automotive 253256 10-Ounce Lens Tint Spray
The Rust-Oleum translucent black is perfect for people who want to put a serious finishing touch on their favorite four-wheeler. Although the can is a bit more expensive than average, the performance this layer of tint brings is high-quality.
Going down the translucent path is great if you want the option to apply gradually. A layer of this black spray will allow a lot of light to go through. So, if you want a more shadowy look, repeat the process until you are satisfied (as long as the tint is within the legal limits).
Pros
- A translucent black color that can be applied gradually
- The tail light tint spray can be used on all sorts of lights (not headlights)
Cons
- The can is a bit pricey, but it gives you a great bang-for-buck
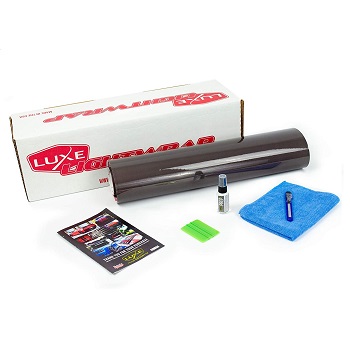
6. Luxe LightWrap Mid Smoke Universal Headlight Tail Light Tint Kit
The luxe wrap comes in large rolls to help you cover your tail lights, bumper lights, and even headlights. The manufacturer guarantees that the layers last up to ten years, meaning that the protective layer has extra thickness. The application is quite simple, especially since you get the comfort of trying again (thanks to the repositionable adhesive on the film).
Though you will need a heat gun to help you out, the film doesn’t cause much bubbling once you start applying it.
Pros
- A multi-purpose tail light and headlight tint film
- The repositionable adhesive on the film allows for some mistakes during the initial application
- The layers last up to ten years
Cons
- The color may look a bit darker, so make sure to check the laws on dimming the headlights in your area
Tail Light Tint Buying Guide
 Since these tinting methods are quite simple, and the ordeal revolves around the sole act of application, I’d like to address some general stuff to keep in mind before you make a decision. Hey, a little knowledge can go a long way, right? If you are hungry for more articles on car equipment and gear – please check what else I prepared.
1. Color
Essentially, when you go for a tail light tint, spray, or film, you can do a couple of things – change the color value and opacity. Or, in layman’s terms, you can either change the color, make your current color darker or brighter, or you can do both. Whichever method you pick, I encourage you to check your local laws and see what the governmental stance is on darkened tail lights.
The thing is – some states have strict laws that limit you from absolutely darkening their tail lights, making them obsolete just for the looks of it all.
While most people go for the shadow look and effect, some people decide to brighten up their tail light to make them more visible. It all depends on your taste and the effect you want to achieve (as long as it is within legal limits).
2. Finish Type
Once you decided on the method and the wanted shade, one question remains – matte or glossy. Or maybe iridescent. Most tail light tint sprays offer both sides of the spectrum, while tint films generally come in glossy versions.
In my experience, glossy surfaces attract way fewer dust particles. Matte surfaces also tend to retain more water from rain and snow, so they get damaged faster. This is, however, to be taken with a grain of salt, since it is anecdotal.
3. Tail and Headlight Tint Sets
If you’re feeling adventurous, you might want to get a set that helps you revitalize both tail lights and headlights. Keep in mind – while most film sets fit both and back of the car, not all sprays are like that. This happens thanks to the different light nature of tail and headlights.
Installing the same shade of light tint can give your car a wholly different look. Once again, if you intend to refresh the headlights, check the state law, please.
How to Apply Tail Light Tint Spray
Every tail light application, no matter the method, should start with a good cleaning. Here’s how to approach the whole ordeal. And yes, you may find everything challenging the first time, but it gets easier very quickly.
- Take a slightly damp microfiber cloth and wipe the tail lights entirely, corners included (as much as you can reach). Avoid using cleaning agents since they can react with the spray.
- Now you will need some sandpaper. Start with 800 or 900 and work towards 1000 and 2000. The finer you go – the better.
- The most important part is protecting the rest of your car from getting sprayed. Masking tape and old newspaper will do the trick. Isolate as much as you can, leaving only the surfaces you are about to spray over.
- Take the spray bottle and shake it well. Check for any special instructions on the label, and shake longer if needed.
- Apply the first level of tinting spray. Wait for about 20 to 30 minutes and apply another coat.
- If need be, apply another layer after the second layer dries up.
- Remove the masking tape and enjoy the results.
How to Apply Tail Light Tint Film?
 Tinting the tail lights with films and foils is different than spraying, but, like spraying, it also requires a bit of preparation. You will need a pair of scissors and something to measure the film with.
- First and foremost, some cleaning is due. Once again, avoid chemical agents and use some water with a microfiber cloth.
- Take out the film you want to apply, and cut it about the of the tail light. Go wider, you can cut down later.
- Remove the protective layer from the tint film and apply it to the now dried-up tail light. If you want the glue on the film to last longer, a mild ethanol solution might do.
- Quickly and gently place the film over the tail light. A squeegee can help you even out the spread.
- A heat gun can also be helpful (with the squeegee) to iron out the irregularities
- Once everything is in place, use a fine box cutter to cut out and remove the excess film
FAQ About Tail Light Tint Sprays and Films?
1. Is tinting your car’s tail lights legal?
The short answer is yes. The more accurate answer is – tinting your tail light is probably legal in your state unless you go too dark so the light can’t communicate with other traffic participants.
Make sure to check your local laws. If you are unsure, take a trip down to the local car mechanic and they will certainly know whether tinting the tail lights is illegal.
2. Are window tints good for tail lights as well?
You can use window tints to refresh your tail lights, only with the special kind of window tint that allows it. The safest way is to get a tint that can help you out with your specific tinting request. In short, if you want to tint the tail lights only, get a tail light tint.
3. How often should I reapply tail light tint?
There is no strict rule on how often you should apply tail light tint. Actually, it all depends on the weather in your area throughout the year. If you get a lot of precipitation there, you will certainly have to reapply the tail light tint more often. Rain and snow, extreme summer heat and freezing winters – it all adds up, slightly damaging the tint your car already has.
Wrap Up
And there we go – now you know everything there is to know about the best tail light tint methods and styles. As you could read above, there are several routes you could take. But whichever method you pick, I got you covered, both with specs and with the proper way to apply the new tint. Additionally, I’d like to urge you to start small. People tend to overdo the tinting, making the tail lights virtually useless.
Using this guide, you’ll be able to make a decision on your own and use the newly acquired knowledge to pick a style, model, and method. Now get out there and give your four-wheeled friend the new fresh look it deserves!