Every driver has experienced the symptoms of a bad car battery at least once. More often than not, car batteries malfunction either with cars parked for a long time or in the worst case – in the middle of the road. Even though the former is not an immediate issue, knowing how to keep your car battery healthy is not only safer, but cheaper as well. After all, car batteries are meant to last for at least 5 years, so why gamble away a perfectly healthy unit?
In the next article, I am going to let you in on some DIY tips and tricks on how to clean car battery terminals. There is no greater feeling than fixing a car issue without the help of a car mechanic. Let’s see how to get there.
Car Battery Basics
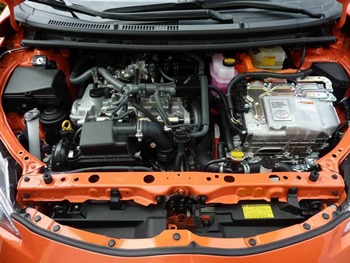
 As you may know, every vehicle has some sort of battery inside. If we are talking about cars with internal combustion engines, the battery system is fairly simple. The main purpose of a car battery is to provide enough energy to the starting motor, which in turn fires up the engine responsible for, well, movement. The car battery’s role ends here until there’s a need to turn the engine on again, or to power electronics while the engine is off.
The battery gets charged through a generator called the alternator. This generator uses the mechanical energy from the engine to power every electronic part while the car is running. So, in a nutshell, it goes like this:
- Car battery sends electricity to the starter
- The starter starts the engine
- The engine moves the car and the alternator
- The alternator generates power to supply the electronics and to charge the battery
This is a normal cycle that happens constantly while the car is on. But, a damaged battery can (and will) significantly hinder the whole process, and ultimately break the cycle, causing the car to stop.
What are the battery terminals?
Every car battery (or a regular battery for that matter) needs to have connection points. We call these points – terminals. As you might already know, electricity has a flow direction, and the terminals give you just that.
- Anode – the terminal marked with a + This is the positive end of the battery.
- Cathode – the terminal marked with the – sing, This is the negative end of the battery.
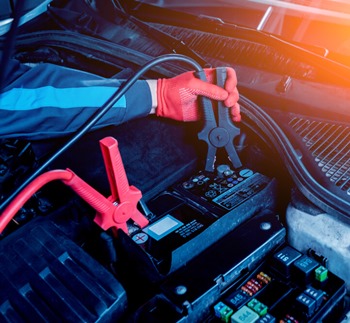
Technically, if all you want to do is clean, you do not have to know any more than that. But, every once in a while we all had to connect jump-starting cables to the car battery. In this case, the little bit of knowledge about the car battery can be a lifesaver.
Why Is It Useful to Learn How to Clean Battery Terminals?
Well, there are several answers to this question. But, the biggest reason why I’d like ever driver to learn how to maintain and diagnose their car batteries is – independence. Now, I am not telling you to stop going to your car mechanic. All I’m saying is – smaller repairs and minuscule issues can (and should) be fixed in the comfort of your own garage.
Another big reason to learn how to clean your car battery is, of course – money. There are town mechanics out there that make a pretty buck just by pouring some vinegar and cleaning the rust off your car battery. No, not every mechanic is like that, by that doesn’t deny the existence of opportunists. By taking control over smaller things (like de-rusting your battery) you can actually save a lot of money and time down the road.
The third reason for learning how to maintain a car battery is environmental. A battery is essentially made of lead and strong acid. Neither of those is considered exactly environmentally-friendly. Your typical SLI (starting, lighting, ignition) should last you for at least 5 years if everything goes normally. Now, disposing of ineffective or dead batteries should be done with caution, which usually ends with bringing the battery to a designated facility that deals with processing old and faulty electronics. Some car workshops or part retailers can take the dead car battery off your hands, but the truth is – not everyone has access to such a commodity. So, if you have any respect for the environment, you should either bring the battery somewhere adequate or simply store the dead battery at home.
Lastly, you should learn how to maintain the battery of your car simply because you will get to know your vehicle better, thus making you a better driver.
When Is the Best Time to Clean Battery Terminals?
 Well, as it turns out, there is no perfect moment to clean the terminals. I mean, it would be great to make regular check-ups, yes, but sometimes a little corrosion can slip through.
So, making “under the hood check-ups” a regular thing is the right way to go. But, once rust starts making itself at home on your battery terminals, you have to act and act quickly.
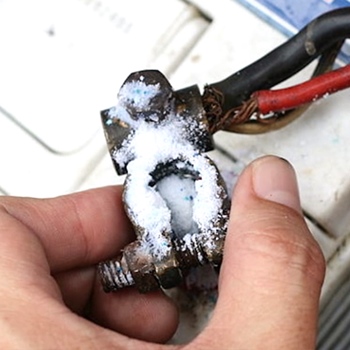
Battery Corrosion
Inside the battery, chemical reactions happen all the time between the acid and the lead. This chemical reaction has a byproduct – hydrogen gas. This hydrogen mixes with other metal elements around, making a layer of, you’ve guessed it – rust. If the buildup of hydrogen is getting significantly bigger than expected, you can go to a car shop and see where the issue is coming from. Sometimes, batteries come faulty, and there is nothing we can do about it.
The other type of corrosion, the one you can do something about (to a degree) is – galvanic corrosion. Without getting into the whole concept of galvanization and zinc-related corrosion, I can tell you that this type of damage happens when two different metals touch, which can often be the case under the hood of your car. Galvanic corrosion can be hard to spot because it is slower than hydrogen-caused. If you manage to spot it, your town mechanic should be able to tell you how to prevent it in the future.
Cleaning Battery Terminals with Vinegar
Finally, we get to the sole process of cleaning. There is a reason why I didn’t want to put you directly into this process – knowing the basics around car batteries and battery corrosion is as important as the cleaning process itself. Simply taking a bottle of vinegar and pouring it over the terminals is ineffective, and often dangerous. But now that you familiarized yourself with the essentials, we can go through the process of cleaning the battery terminals with vinegar.
1. The Equipment You Need
Nothing special here. The chances are you already have everything it takes in your garage and your kitchen. To clean the battery terminals with vinegar, you will need:
- Pliers and pincers – in some cases the corrosion sets in deep, or even worse it builds up over the clamps. Any tool that can help you surpass this obstacle will suffice.
- White vinegar – get is as pure as you can. One cup will do the trick, but it wouldn’t hurt having an extra cup nearby, especially if you are doing this for the first time.
- Some rags or cloths – old shirts, kitchen rags, anything made of cotton to be exact. Just keep in mind that these rags and cloths are going inside the trash can as soon as you’re done cleaning the battery terminals.
- Spray bottle – this is not a must, but a spray bottle will help you spread out the vinegar more evenly.
- Baking soda – also not a must. Baking soda goes great with vinegar when battling super stains is in order.
- Brush – harsh metal brushes are your heavy-duty cleaning ally
- Petroleum jelly – petroleum is known for being electrically inert, meaning it is great for coating the terminals once you’re done cleaning them.
2. The Cleaning Process
The very first thing you need to do before you start cleaning is – check for leakage. Acid leakage in particular. If you notice that your car battery is leaking, I’m afraid it is time for a new one. Just remember to dispose of it properly. If the corrosion is the only issue, here’s how you combat it:
- This often goes without saying, but you’d be surprised how many people disregard this step – turn the engine and the starter off! Take the key out, so you’re sure.
- Now, remove the caps protecting the clamps, if there are any. You should always disconnect the negative terminal first. After this one is off, take the positive clamp off the terminal as well. *
- Once the battery is free, you can take it out to get more maneuvering space while you clean and to protect other car parts under the hood.
- Now, it is time for the vinegar. Fill a spray bottle with white vinegar and start spraying it on the terminals. Leave the battery to rest for at least an hour. The vinegar needs time to work its magic. **
- Use a clean rag to wipe everything off. In some cases, you will need to use a bit of elbow grease and a harsh brush. Try not to break the terminals while scrubbing.
*Sometimes, the amount of corrosion that settles in can be more than vinegar can handle. In case you can’t get the clamps off, you need to use the tools and try to shimmy the clamps away. Be careful not to break them.
**While the vinegar is doing its magic on the battery terminals, it would be a wise idea to cleans the clamps as well.
3. Cleaning the Terminal Clamps
Once you manage to take the clamps off, take a bowl (preferably plastic or glass) and pour some vinegar in. Now, submerge the clamps into the vinegar, and do not let them touch. Pour more vinegar if needed – the level should be just enough to cover the exposed metallic parts of the clamps.
You can leave the clamps on until you clean the battery. Technically, wait at least an hour. After the battery is dried up, wipe the clamps with a dry cloth and let the excess liquid airdry. It is important for the clamps to fully dry before you reconnect them to the battery.
4. Super Corroded Terminals
 If the corrosion proves too much to handle, you can use baking soda. This is how you do it:
- After the terminals are soaked with vinegar, pour some baking soda on the corroded spots. Wait for the fizz to go out, and clean with dry cloths.
- If you go with baking soda first, the vinegar will make a volatile reaction with it. This can do the trick, but the effects are the same with vinegar first, just less messy.
- After the reaction finishes, use a brush to clean the corroded parts.
Safety First!
Now you know how to approach car battery (and clamp) corrosion. This issue is common, especially with cars that are driven every day. However, I would like to take a moment to address the safety aspects of cleaning car battery terminals with vinegar.
- Wear old clothes. During the scrubbing and wiping process, some splashing is bound to happen. You will get dirty, so make sure to wear protective clothes that cover the skin as much as possible. Protective gear like acid-proof gloves and protective eyewear should be a must!
- Do not use water at any stage of the cleaning process. Water causes rust and it will do more damage than good. Besides vinegar, you should do your best to keep the battery dry.
- Do not try to recover a dead or broken battery. If the battery is clearly out, trying to fix it is not that safe. After all, we are talking about materials that are hazardous for living beings.
Before You Go
Neglecting car maintenance is the number 1 reason for vehicle malfunction. People either decide to skip a checkup because of expenses, or they simply forget. With the DIY tips I provided above, you will not only know how to clean battery terminals – you will be a step closer to independence. Fighting everyday vehicle issues with knowledge is the best (and safest) way to go.
Truth be told, not every car battery can be saved. But people discard well-functioning car batteries all the time, just because the terminals turned a little rusty. Well, now you are not one of those people anymore. Now, go and give your car battery a quick checkup.