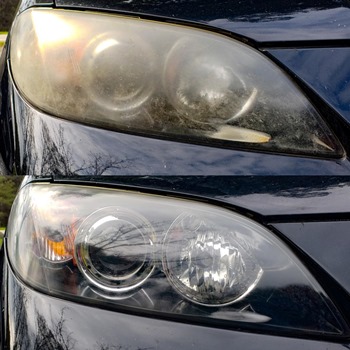
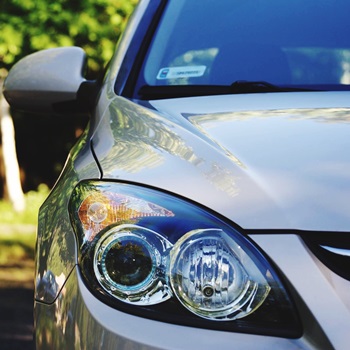
Using the best restoration kit has both safety and aesthetic benefits! If you notice that your nighttime visibility is getting worse, you should take care of that problem as soon as possible. But you may not need glasses, after all, it may just be your headlights. The fault may not be in your light bulbs either – if you’ve replaced your lights in the past couple of months, it’s not likely that they are the problem. The source of the problem may be something very simple – the plastic on your headlights is in need of maintenance. It’s just another truth of life – headlights get dim and dirty over time.
To help you pick the very best, we prepared our headlight restoration kit reviews and buying guide. This simple procedure will affect your driving experience in the long run. Let’s dig in!
See The Quick Comparison Chart
Do You Need a Headlight Restoration Kit?
 Driving in the dark is dangerous. We all know that, and nobody wants to risk their life driving with reduced nighttime visibility. Sometimes your headlights may give you headaches because of unreliable wiring, or your lightbulbs may have weakened and require a replacement. But if you suspect that none of this is the case, you should check out the state of your headlight plastic.
Over time, a lot of dust, grime, insects, and mud gets onto the surface of your headlights. Together with the sun’s UV rays, these environmental factors negatively affect the protective layer used by manufacturers. Even if you include a brief cleaning of your headlights in your regular car wash routine, your headlights will require detailed maintenance regardless. Don’t get us wrong – a regular wash does prolong the time your headlights stay at the top of their game, but most car wash shampoos aren’t formulated to clean transparent glass or plastic properly. So, though few and far between, your headlights will need a restoration eventually.
1. How to Proceed?
When the time comes, you have two options: go to a professional detailer, or DIY it. But one thing is always true – you must restore your headlights if you want to stay safe on the road.
1.1. Professional treatment
Treatment at a professional detailing parlor is generally a good investment – in most cases, the employees do a meticulous job. However, such treatment can be considered a luxury. You will easily pay a hundred dollars and more for a simple headlight restoration job.
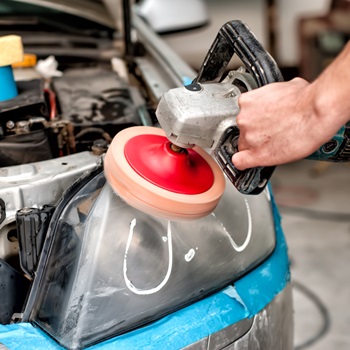
1.2. The Do-it-yourself approach
But are you capable of doing it yourself? Of course, you are. Headlight restoration is, in fact, very simple. You don’t need a lot of strength, skill, or time – it mostly comes down to having the right set of tools and following simple directions. Even a complete newbie will be able to complete the task in about an hour, and we will help you by providing the directions down below. And when it comes to the tools, you can get a good headlight restoration kit with everything you need for the job for as little as ten bucks.
2. The Contents of a Headlight Restoration Kit
So, what exactly do you get for the money? While the definitive list differs among manufacturers and types of restoration kits, some basic contents appear throughout the different options.
First of all, these kits come with two types of liquid – an activator that helps you remove grime, and an after-treatment liquid that protects your squeaky-clean headlights. Secondly, the kits typically contain either a soft applicator pad or sandpaper, usually several squares of different grits. Additionally, you may find helping tools like masking tape or latex gloves in a higher-tier restoration kit.
Benefits of Headlight Restoration Kits
 Restoring your headlights to their original glory comes with many benefits, some obvious and some less so. Let’s take a quick glance at everything you get when you do your headlight maintenance.
1. Ensured Safety
Dim headlights are a liability. Whether you’re driving when you can’t see clearly, or you compensate for the lack of light by using high beams, driving with cloudy lights is flat out dangerous. By restoring your headlights to their original state, you can increase the luminosity ahead of you by as much as 40%. Protect yourself, your passengers, and other drivers by making sure neglected headlights don’t impair your vision.
2. Prolong Lifespan
This one goes without saying – if you maintain your headlights, you don’t have to replace them. Car parts are pretty expensive, and replacing the plastic of your night eyes is not an exception. Keeping regular and good care of your headlights is imperative if you want to make the best (and the longest) use of the pair you already own. An occasional headlight restoration included.
3. Save a Buck by DIY-ing it
By now, you know that headlight restoration is simply something that has to be done. But you do have a choice of how and when you do it, and how much money you spend to have it done. Essentially, you have two choices – spend a hundred to have a professional car detailer restore your night vision, or do it yourself for a fraction of the price. DIY-ing is not nearly as hard as it may sound, and the available headlight restoration kits equip you with everything you need for the job.
4. It Looks Good
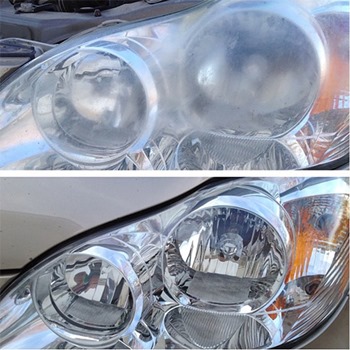
If you enjoy flaunting a perfectly shiny, waxed car with no scratch to be seen, it’d be a pity to have such an important part of your car’s front look neglected and old. After a while, headlights become clouded, yellowed, and overall gross, and the only way to take proper care of them is by giving them a thorough restoration.
This is especially important if you’re planning to sell your car. When estimating resale value, both salesmen and customers pay attention to the little details: how the inside smells, if there are any scratches, the condition of brake pads, and the clarity and cleanliness of the headlights. All of these and many more factors will influence the price you can get for your car if you decide to resell or trade it.
Best Headlight Restoration Kits Comparison Chart
| PRODUCT | DETAILS | ||
|---|---|---|---|
 | 3M 39008 Headlight Lens Restoration System |
| View On Amazon |
 | Meguiar’s G1900K Headlight and Clear Plastic Restoration Kit |
| View On Amazon |
 | Mothers 07251 NuLens Headlight Renewal Kit |
| View On Amazon |
 | Wipe New HDL6PCMTRRT Headlight Restore Kit – 6 Pack |
| View On Amazon |
 | Turtle Wax T-240KT Headlight Lens Restorer Kit |
| View On Amazon |
 | SYLVANIA – Headlight Restoration Kit – 3 Easy Steps |
| View On Amazon |
 | Rain-X 800001809 Headlight Restoration Kit |
| View On Amazon |
Best Headlight Restoration Kit Reviews
1. 3M 39008 Headlight Lens Restoration System
3M is a famous automotive accessory manufacturer, so we had to include their product on our list. This interesting design holds everything you need for perfect headlight restoration. In this kit, you get a disc pad holder which is used to mount the sandpaper to your drill. The manufacturer recommends using a standard household drill with an rpm range of 1200 to 1600. This 3M kit comes equipped with ten pieces of sandpaper, and one soft foam buffing pad. The sandpaper selection includes six 500 grit sheets, four 800 grit, and one 3000 grit sandpaper sheet. These are quite flat and circle-shaped, so they’re not suitable for use by hand. The soft foam pad is great for application and buffing of the included rubbing compound. The liquid, packed in a simple single-use baggie, will not only clean and restore, but also protect your headlights. This great kit does have one drawback – it’s intended for only one use, as you only get 1 fl. oz. of the rubbing compound, and one 3000 grit sandpaper. Still, it leaves your headlights looking great for a long time, so we think that’s not a deal-breaker.
Pros
- Comes with a total of 10 sandpaper sheets
- Big sandpaper range of 500 – 3000
Cons
- Intended for a single-use
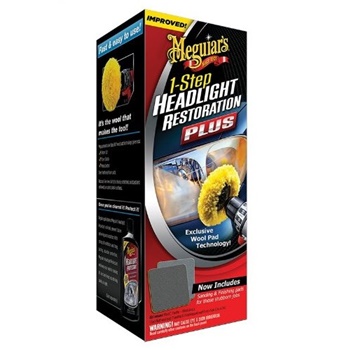
2. Meguiar’s G1900K Headlight and Clear Plastic Restoration Kit
Meguiar’s is a well-known and widely respected household brand in the field of car accessories and maintenance. We’ve picked one of their best headlight restoration kits for our list. Even though on the pricier side, this kit is a safe choice. This kit is partly drill operated – while you do need a drill to use the wool buffing pad, the included sandpaper is used by hand. The star of the show in Meguiar’s kit is the 4 fl. oz. bottle of PlastX, their polishing compound that removes all cloudiness, yellowness, and chemical degradation with its abrasive formula. Even though that’s the only liquid included in this kit, you don’t have to worry about leaving your headlights unprotected. The same formula includes water-resistant polymers that stay on your lens, providing lasting protection. The included sanding pads are easy to hold as they come with a rubber handle. The included sandpaper grits range from 1000 to 3000, so you don’t need to worry about leaving scratches and marks. You can get two or three sets of headlights cleaned with this kit.
Pros
- 4 fl. oz. bottle of PlastX
- Wool drill-operated buffing pad
Cons
- This product is somewhat expensive
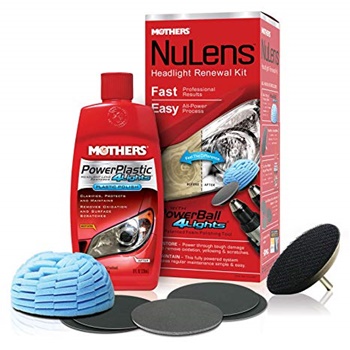
3. Mothers 07251 NuLens Headlight Renewal Kit
Our next pick comes from one of the most popular automotive accessory producers in the USA, Mothers. Their NuLens headlight renewal kit is entirely drill-powered, and it will leave your car with impeccable results. The NuLens kit comes with everything you need to make your headlights look as good as new. This includes an 8 fl. oz. bottle of Mothers’ original PowerPlastic 4lights polish, an interesting foam polishing pad, and five sanding discs. All of the equipment is designed to be used with any household power drill, and you get the necessary backing plate which connects the included components to your drill. There are five sheets of sandpaper included: two 800 grit, two 1500 grit, and one 3000 grit sandpaper, all of which you’ll easily attach to the backing plate mounted on your drill. You don’t need to use all of these – choose only the finer sandpaper, or go through all of the different grits, all depending on the severity of existing scratches, surface unevenness, and chemical damage on your headlight plastic. The included liquid polish can also be used for regular maintenance, once every month or two.
Pros
- The 8 fl. oz. bottle of polish can also be used for regular maintenance
- A large span of sandpaper grits
Cons
- Instead of a single-use sealant, comes with maintenance polish
4. Wipe New HDL6PCMTRRT Headlight Restore Kit – 6 Pack
Our next pick is somewhat unique, as it doesn’t come in the form of liquid polish. The Wipe New Headlight restore kit is a great choice if you find applying masking tape tedious and time-consuming. Every part of the kit is designed so that there’s no reason to fear you’ll damage the surrounding car paint. This kit does come with a polishing compound, but it doesn’t come in a bottle. Instead, it comes already applied to a soft, microfiber wipe. The pre-dipped microfiber cloth is high quality, and it’s ready to use straight out of the box. This ensures you have a hassle-free experience de-hazing your headlight plastic. The entire set is meant to be used by hand, so you don’t need a drill. It’s also designed so that hand application is easy and effective. If the wipe doesn’t do the trick, you can use the two-sided sandpaper pad to get rid of imperfections. The sandpaper pad is easy to hold, and it comes with a 2000-grit and a 3000-grit side, both of which are quite fine.
Pros
- The included microfiber cloth is ready to use straight out of the box
- The kit doesn’t require a drill
Cons
- Not for very damaged headlights, as it only contains 2000 and 3000 grit sandpaper
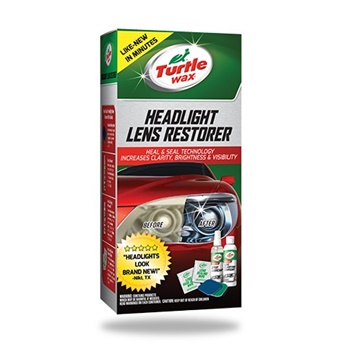
5. Turtle Wax T-240KT Headlight Lens Restorer Kit
Our next pick comes from the beloved household favorite – Turtle Wax. This is a very affordable product, but that doesn’t mean it’s less effective. You can use this kit entirely by hand, so there’s no need for a power drill. This kit comes with everything you need to get your headlights looking like new, and then some. It doesn’t come with a single polishing liquid. Instead, you get four different formulas with this kit. Each of the two bottles of liquid contains 4 fl. oz. of the compounds, including the Lens Clarifying Compound, and a Spray Lubricant for sanding. The two after-treatment formulas come in the form of two 4 by 4-inch wet wipes. These are soaked in solutions including a Lens Base Coat Wipe, and a Lens Sealing Wipe which offers long-lasting UV protection to your headlight plastic. When it comes to sanding sheets, this kit includes three restoration pads, with grits ranging from 2400 to 8000. With such fine sandpaper grit, you don’t need to worry about getting your headlights damaged. However, you may need to put in a bit elbow grease if your lights are in bad condition.
Pros
- A very affordable product
- Comes with four different polish and sealant formulas
Cons
- The coarsest sanding sheet is a fine 2400 grit
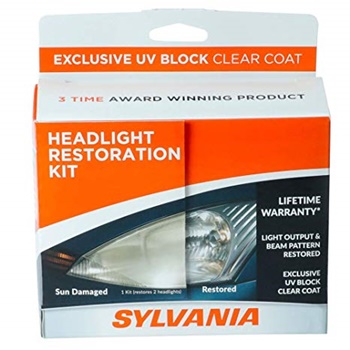
6. SYLVANIA – Headlight Restoration Kit – 3 Easy Steps
The next product we chose for our top list comes from Sylvania, the automotive accessory superstar. This kit is not the cheapest, but it’s definitely a high-quality set. This kit comes with everything you need for the job. When it comes to the formulas you need, this kit comes with 1 fl. oz. of surface activator, a clarifying compound, and 1 fl. oz. of clear coat liquid with UV protection. Other than the formulas, you also get an applicator, two soft cloths for polishing, a vinyl glove, and three pieces of sandpaper. As you can see, there’s very little you need besides this kit, and you only need to have your own water spray bottle, masking tape, and some clean cloths on the side. The quality of the items included is very high, though you may not have enough liquid for more than one use. The included sandpaper comes in a very wide grit range, with the coarsest being a 400-grit sheet that you should only use if your headlights have a lot of damage and uneven surface that needs fixing. Other than the 400-grit sheet, you also get the finer 1000 and 2000 grit sheets.
Pros
- Comes with a great selection of items
- Easy to use – the steps are clearly labeled on the bottles
Cons
- There is only enough liquid for one use
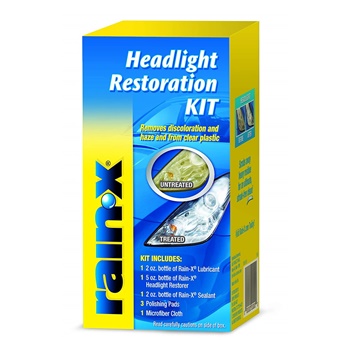
7. Rain-X 800001809 Headlight Restoration Kit
Rain-X makes the next product we decided to feature on our list, and it’s their popular headlight restoration kit. This kit is very good for getting rid of the hazy, cloudy, and yellowed layer of your headlight plastic, and you don’t need a drill to do it. The Rain-X kit includes three bottles of formulas, three grades of sandpaper, and a microfiber cloth which is perfect for the job. When it comes to the formulas included in the box, you’ll find a 5 fl. oz. bottle of Headlight Restorer which is a rather good polishing compound, a 2 fl. oz. bottle of lubricant for easier sanding, and a 2 fl. oz. bottle of Sealant that should be used after the treatment to keep your headlight plastic safe from the adverse effects of the elements. Other than these three liquids, this kit also contains a soft microfiber cloth and three pieces of sandpaper. The negative side of this kit is that the manufacturer doesn’t specify the grits of the included pieces of sandpaper. While they are labeled with 1, 2, and 3, it’s hard to say whether you need to complete all three steps, or just the second two.
Pros
- Comes with a 5 fl. oz. bottle of polish
- The kit includes a high-quality microfiber cloth
Cons
- The manufacturer doesn’t specify the sandpaper grits
Types of Headlight Restoration Kits
 There are two criteria by which we can categorize the different headlight restoration kits available on the market today. The differences between these kits are not immense, but they matter when you’re putting in the effort to make the ideal choice.
1. Single-Step or A Multi-Step Product
When searching for the right product for your car, you’ll come across kits that come with either a lot of different components or that seem overly simple. All of these kits work – but not all of them are intended for the same type of headlight maintenance.
1.1. Single-step kits
As you can imagine, the simple kits, that usually only come with a pad infused with a bit of liquid, are not intended for headlights with heavily caked-on dirt and grime. These are used more frequently, and typically for light-duty cleaning. These products are made so simple that you basically only need to scrub your headlights with them. That’s why we call them single step products.
1.2. Two and three-step kits
On the other hand, you will also come across quite elaborate kits. These can include dozens of components, from various grit sandpapers, over different liquids and wipes, to additional tools like masking tape and gloves. When picking your headlight restoration kit, don’t be swayed by the sheer number of included items. Most headlight restorations can be done with two types of sandpaper and liquids for abrasion and protection. The two or three-step programs are intended for cars with very dirty headlights, or for people who simply like bringing the looks of their vehicle to perfection.
2. Power Tool Requirement
Another important distinction between different headlight restoration kits is whether they’re intended for use with power tools or by hand. If you have a very bad case of yellow, cloudy headlights, you may want to opt for the kit that is used with a drill or a sander. Generally, these are easier to do and take less time to complete. But if you don’t have power tools on hand, or you’re worried that a drill may be too harsh on your headlight plastic, don’t worry. A hand-craft kit works just as well, though these require a bit more elbow grease.
Headlight Restoration Kit Buying Guide
 Even though it may not seem so in the beginning, it’s not easy to choose the right headlight restoration kit. There are many factors to consider before you can be sure that you’ve picked the best kit for your vehicle. In this section, we will cover all of the most important things you should think about before making your final pick and purchasing a headlight restoration kit.
1. The Contents
The most important thing about cleaning your headlights is having the proper tools to do it. While any restoration kit on the market comes with enough to do a basic job, not all of them are the same. In fact, the differences between kits can be quite big when you take a look at their contents.
All of these kits come with some sort of:
- Abrasive liquid,
- Sandpaper and/or applicator pad,
- After-treatment sealant.
The definitive choice of contents of an ideal kit should depend on the severity of the damage on your headlights. That’s why you should be well off with a simple one-step applicator if you only have somewhat hazy headlights. On the other hand, if your headlights are yellowed, cloudy, and even stained, you should go for a more thorough cleaning with sandpaper.
1.1. Sandpaper
Sandpaper is a commonly used tool in car polishing and restoration work. When it comes to restoring your headlight plastics, sandpaper is used to remove the oxidized, hazy, and old protective layer on your lights. Typically, sandpaper used for this type of work is much finer than the one used for woodworking, for example.
Generally, we measure the coarseness or fineness of sandpaper in units we call grit. The lower the grit number is, the coarser the sandpaper. So, 50 grit means very coarse, while 200 is quite fine already.
However, in automotive restoration, you should use much finer sandpaper in order to avoid damaging your vehicle for good. In a typical headlight restoration kit, you can find sandpaper grits that are measured in thousands instead of hundreds. For example, you may get three sheets of sandpaper, with grits between 1000 and 8000 grit. Some manufacturers may include somewhat coarser sandpaper, but these should only be used for very damaged and dirty headlights. These papers are fine enough not to leave marks on the vulnerable plastics of your headlights, while they’re also strong enough to get rid of the most damaged layers, leaving you with perfectly shiny headlights with a polished look.
Keep in mind that you must add a protective layer on your headlights after you sand them down. Sandpaper literally removes a layer off of your headlight plastics, leaving it more vulnerable to environmental damage.
1.2. Applicator Pads
Instead of or along with sandpaper, you may get an applicator pad. There are various different applicator pads available on the market, and many manufacturers like to make and include their own products in restoration kits. That’s why you may notice that headlight restoration applicator pads come in many shapes and forms. They can be made from wool, foam, or even cloth. There’s no best or worst solution here.
Most restoration kits come with both sandpaper and applicators. This is the best combination because you can use the applicator for your liquids, but also for fine buffing. However, if you get a restoration kit that only has a pad and no sandpaper, you should make sure you get one of high quality. If your headlights are very clouded, you may need a lot of elbow grease (or a drill) to get the job done properly.
2. Sealant With UV Protection
When picking out your headlight restoration kit, make sure that the after-treatment sealant you get provides some sort of UV ray protection. Apart from dirt that gets physically stuck on your headlight glass, the sun’s ultraviolet (UV) rays are the main cause of headlight yellowing and hazing. This is a problem everywhere, but people who live in warm, arid environments may notice the worst effects. UV rays directly affect the clear coat that manufacturers add as a protective layer to the headlight plastic. If you’d like to make sure you don’t need to repeat the restoration process for at least another year, you should make sure that your sealant comes with UV protection. This way, you will ensure your headlights stay in tip-top shape for as long as possible.
3. Ease of Use
Finally, one of the most important factors for a DIY headlight restoration kit is that an average person can, in fact, do the job properly and with ease. One of the most important things to be on the lookout for is the label that states whether you do or don’t need power tools to restore your headlights with the kit at hand.
3.1. Kits for Power Tools
Some kits come with sandpaper and applicator pads that are designed to be attached to either a household drill or an orbital polisher. These come with specific attachment systems for these power tools, and they do their jobs best when combined with the powerful rotation of the tools. While you can use these by hand, it’s far less effective. If you don’t own power tools, you may need much more time to complete the task with a power tool intended kit than a handheld one. That’s because the power tool kits come with specially designed pads that aren’t very comfortable to hold.
3.2. Hand Tool Kits
On the other hand, if you don’t have power tools or don’t feel comfortable using them in your car, you can’t go wrong with a hand tool kit. While restoring your headlights by hand may sound tedious and time-consuming, that’s not truly the case. These kits are designed to be very effective when used by hand, and they’re comfortable to hold and operate. Though you will need more time to complete the task by hand, you don’t risk the thorough damage that can happen when power tool restorations get out of control.
How to Restore Your Headlights?
 As with any type of car maintenance, there are right and wrong ways to restore your headlights. The exact way to restore your headlights will depend on the particular kit you have, but all of them function on some basic principles. Make sure you read the manufacturer’s directions and recommendations for the best information on how to use your kit.
That being said, we will cover the generic steps of headlight restoration. These are shared across most kits available on the market today, with some variation. You will notice that headlight restoration is much simpler than it may seem at first, even though the kits come with a variety of tools.
1. Preparation
Before you can start returning your headlights to their former glory, you need to prepare your tools and your car properly.
- Pick a nice, sunny day to restore your headlights, or do it inside your garage. Don’t let frost, snow, or rain ruin your efforts.
- Wear latex gloves, or a similar kind of skin protection when dealing with these chemicals. The abrasive liquids and the sealants of headlight restoration kits can be pretty harsh on your skin. In the worst case, you may end up with a mild chemical burn, and skin or eye irritation if you don’t use protective gear.
- Prepare a couple of clean, dry microfiber cloths. You will need these throughout the process.
1.1. Washing
Before you jump into the abrasive part of the restoration, you should wash your headlights. If you skip this step, you may end up dragging a piece of debris like a stone or an insect, which will additionally scratch or smear across your headlight, making your job harder. In order to avoid unnecessary complications, you should wash the plastic of your lights before you start sanding or buffing.
You can use a mild solution of any car wash soap, or even just regular soap. Use a sponge or a mitt, and try to get rid of as much dirt as possible.
Rinse your headlights with clean water, and pat them dry with a clean microfiber towel. Alternatively, let them dry on their own.
1.2. Protect the surrounding paint
Cover the immediate area around each headlight with masking tape. Try to get the masking tape right in between the headlight and your car hood and other painted areas. Protect the car paint around the headlight as sanding and the chemicals can result in some preventable damage.
2. Abrasive Liquid
Before you jump into sanding, you first need to use the abrasive liquid from your kit. In most cases, you will need a clean microfiber cloth for this step.
Pour a bit of your liquid onto the cloth, or directly on the headlight if your user manual states so. Using circular motions, polish the entire area of the headlight. Repeat until you see improvement in the clarity of the plastic.
If you’re happy with how your headlights look like, you can jump straight into applying sealant. But if you’d prefer a bit more clarity and shine, you should follow the next step.
3. Sanding
Once you’ve done everything that can be done with the first-step liquid, it’s time to get your sanding sheets out.
3.1. Sandpaper grit
The chances are that your headlight restoration kit includes a couple of small pieces of sandpaper marked with numbers starting with 1. You should follow this order. If you see bigger numbers marking the sandpaper, these are probably the actual grit ratings of the sandpaper. Typically, headlight restoration kits include grits between 1000 and 8000, but some manufacturers include paper as coarse as 400.
Unless your headlights are in dire need of a good sanding, we would not recommend using sandpaper with a lower grit rating than 800. These can be way too strong for the sensitive headlight plastic, especially when used by people who don’t have experience doing the job.
3.2. Sanding technique
Check your manual to see whether you should use your sandpaper with a lubricant or the provided abrasive liquid. Most headlight restoration sanding is done wet, but this is not necessarily the case.
If your headlights still need a lot of work, take the coarsest sandpaper – the one with the smallest number on it. If they seem pretty clear already, and you just want to give them a bit more treatment, you can start with finer, higher number sandpaper.
Sanding can be done in straight lines from one side to another. Try to apply even pressure throughout the process, and avoid working on a small area for too long. If you can, try to cover the entire headlight in one motion.
After you feel the sandpaper has made the headlight a bit smoother, wipe the plastic with a clean cloth, and move on to finer sandpaper with a bigger number on it.
4. Buffing
After you’re done sanding, and you wipe off the remaining liquid and dust, it’s time to buff your headlight to give it shine. Take a clean cloth, add your second-step liquid, and buff the lens. Move your cloth in a circular motion, and apply moderate pressure. We recommend using microfiber cloths for buffing because they’re soft and don’t leave scratches or residue of their own.
5. Sealing
Once you’re satisfied with how your lens looks like, it’s time to apply sealant. Some sealants come in the form of a wet wipe, while others require a clean rag to apply in a similar way to buffing. Check your headlight restoration kit for the exact method of sealing.
Applying sealant is very important because it protects your freshly sanded headlight plastic with protection from UV rays, dust, water, and so much more.
FAQ about Headlight Restoration Kits
1. Why are my headlights dimmer than before?
There are a couple of different reasons why your headlights aren’t as bright or don’t reach as far as before. If you find yourself using your high beams more frequently, you should try to find the cause for the diminishing brightness. There are three common reasons your night visibility may be declining:
- Your headlights are cloudy. You only need to take a look at the front of your car to check if this is the case. If you notice that your headlight plastic isn’t completely see-through, the glass is hazy, or even yellow – it’s time for a thorough cleanup with a headlight restoration kit.
- Your headlight bulbs need changing. Over time, light bulbs become dimmer, until one day they just stop working. Depending on the type of bulb, this may happen earlier or later. Top-rated halogen headlight bulbs are the most common type in cars, but also the one that needs changing most frequently.
- Your wiring might be off. If you don’t think your headlights need cleaning, and you changed your lightbulb fairly recently, your vehicle may have a problem with the power connection to one or both bulbs. Take your car to a mechanic for a check-up.
2. Why do headlights get cloudy and yellow over time?
There are many reasons why this may happen, and this includes various environmental factors such as dirt, rain, humidity, and others. But the most common causes of clouding are oxidation and UV damage. While there’s nothing you can do about the natural process of oxidation, you can protect your headlights from the detrimental effects of UV rays if you get a headlight restoration kit with a sealant with UV protection.
3. Can cloudy or yellow headlights make my car fail inspection?
Yes, although this is not very common. If your headlights are in a very bad condition, looking very old and hazy, they pose a risk to you and other drivers on the road. Cloudy headlights can’t send light far enough, and the dirt may cause some strange light refractions. If this is the case with your car, the inspector will be forced to fail your car. Your safest bet is restoring your headlights before the day you have your inspection scheduled.
4. How frequently do I need to restore my headlights?
There is no definitive answer to this question because this mostly depends on your driving habits and the place you live in. However, if you use your car on a daily basis somewhere in the USA, chances are, you will need to restore your headlights about once a year.
Essentially, you only need to take an occasional look at your car to make sure your headlights are in order. If they start to look hazy but don’t impair your vision at night, you should start preparing for restoration. But if you notice your nighttime visibility is greatly reduced, you should restore your headlights as soon as possible.
Wrap Up
Driving at night should be a relaxing experience. But if your knees are knocking while you’re driving, worrying that something may be coming your way and you’re not able to see it, it’s high time to get your headlights back in order. Hazy and yellowed headlights are a big liability, but this is, luckily, a problem that’s very easy to solve. With the best headlight restoration kit, you can bring your nighttime visibility back where it should be. The great side-effect is that your car goes back to looking as good as new.
We hope our headlight restoration kit reviews helped you find the best solution for your car, and that our buying guide has all of the info you needed to make the right choice. If you have any questions left, don’t hesitate to ask us in the comment box below!